Writing a synopsis, script, storyboard and shooting schedule
Introduction
From feature films and documentaries to scripted reality-TV shows, every film and video tries to tell a story.
In this chapter you’ll learn how to write a synopsis and how to develop a script or a storyboard for your video project – the basis of all good film productions. You’ll also find out about putting together a shooting schedule to help you at the filming stage.
| |
Vision in action |
|
|
||
Equipment and tools
You’ll need something to make notes with. This could be a pen and paper, computer, tablet, or a combination of these.
For example, if you write your script on a computer, you can share the electronic document with people who are not where you are. But you might find that pen and paper are best when you’re drawing a storyboard.
Main section
At the heart of every film is the story you want to tell.
It might be a story that already exists in some form – for example as a written text or a radio play. Or it might be written specially for your film. In the case of documentaries, the story could even develop during the shoot itself.
Including drama in the narrative – conflicts and contrast between characters, unexpected events, extreme emotion – can make the story more interesting. The less predictable the outcome, the more dramatic the story.
To help you develop a story with good dramatic effect and bring it to life in film, you’ll need:
- a synopsis
- a script
- a storyboard
Having these in place before you start working on your film is also important if you’re looking for people to support your project.
The three-act structure
The so-called three-act structure is a common approach to script-writing. Here is a quick outline – you can find out more in Plot and character analysis.
- Act I: Set-up, or exposition. We find out about the main characters, their inner and outer conflicts, and key locations.
- Act II: Confrontation. The main character struggles to overcome the obstacles that keep him or her from resolving his or her conflicts.
- Act III: Resolution and conclusion. A dramatic event leads to the resolution of the main conflicts and the conclusion of the story.
The synopsis
A synopsis is a short description of what happens in the film. It’s the idea for the film, put into words.
A synopsis is different from a script in that it includes only the most important or interesting parts of the story. It is usually used to present the film idea to producers and directors. You might also use it when you’re submitting your film to a festival, or when you’re applying for funding.
Length of synopsis:
- Short film – 10 lines
- Documentary – 30 lines
- Full-length featured film – 2 pages
Example of synopsis for a short film
The misunderstood dog
by Robert Biggins
Fluffy is an unlucky dog. Neither of his owners – a couple who live in an old-fashioned house in the suburbs – seems to like or understand him. They’re always asking him to do things he doesn’t understand, and they don’t care about his needs.
Two days before Christmas Fluffy decides to run away and find a place where he feels more comfortable. On his quest he faces many risky situations, which makes him homesick. He wishes he could be at home again.
In the meantime, his owners are looking for him all around the house and fearing the worst. But on Christmas Eve, with snow falling heavily, Fluffy arrives at the house again. From here on Fluffy is treated much better by his owners, and finally becomes aware what they mean to him as well.
The script
Every film or TV broadcast is based on a script. The script could be noted down/drawn in detail, or it could just be an idea in your head.
A film or broadcast should never be filmed at random. You’ll always need a script, which is the product of your creative thinking and helps to guide the shoot.
Writing a script
Remember that you’re narrating through film. The story should come across in the moving image, combined with original sound, voice-overs, and any additional sounds and music.
This might seem obvious, but it’s crucial for writing a good script. Unlike with a book or a radio play, you can actually show what happens so you don’t need to explain it verbally as well.
A good script will lay out what happens in each scene, which helps you work out what material you need to shoot. It might even include ideas for the editing stage, for example what transition to use from one scene to another. This saves a lot of time during the shoot itself, and it gives the director or camera operator an idea of what needs to be captured and how.
The script should describe everything about the scene. This includes the place, time of day, props, lighting, how the protagonists look, what they’re wearing, what happens in the scene, and any dialogues between the characters. The script might also contain the text narrated through a voice-over, as well as hints about what sort of music will need to be added in post-production.
All scenes usually follow the same format in the script: first describing the background setting, then the characters, then the dialogue.
Example of a script:
Title
THE MISUNDERSTOOD DOG
By Robert Biggins
Scene 1
Two days before Christmas in the 1970s. No snow has fallen yet and the weather is quite cloudy.
We see an old-fashioned two-storey house in a suburban area from the street. A light is on in the attic and on the ground floor. Mr Miller (pensioner, the stereotype of a grandfather, wearing a blue-checked shirt, black trousers with braces) and his dog Fluffy (terrier) are in the attic of his house, searching for something under a load of dusty old furniture and other random stuff.
MR MILLER
Fluffy, do you know where I put those old Christmas records?
FLUFFY
(barking, as if to say ‘No!’)
MR MILLER
Oh, Fluffy, you’re not much help, are you!
Fluffy is offended and runs down the stairs.
Scene 2
Mrs Miller (the stereotype of a grandmother, wearing an apron) is baking Christmas cookies in the kitchen of the house. There is a very warm atmosphere.
MRS MILLER
(talking to herself)
Oh, Jesus. Every year I have to bake all these cookies, and every year it seems to get harder and harder.
Fluffy enters the room hastily, happy to see Mrs Miller.
MRS MILLER
Oh, Fluffy, my dear! Good to see you. Where have you left Grandpa?
Fluffy sits down next to Mrs. Miller and looks at her full of expectation.
MRS MILLER
Oh no, Fluffy. These cookies are not for you! Don’t you dare stare at me like that. You already had your lunch!!
Fluffy is offended again and runs out of the kitchen.
Scene 3
Fluffy runs out of the main door of the house into the garden, which leads onto a field. After hesitating briefly, Fluffy leaves the garden and enters the field.
…
If you don’t have time to prepare both a storyboard and a script, you could just write a script and decide on individual shots while you’re filming. Or you could write a storyboard and leave out the script. This should be ok for a smaller video project.
The storyboard
Ok, so you have a script! Now you need to make sure that everyone involved in the production interprets it the same way and has a shared idea of how the film will look.
In other words, you need to develop a storyboard based on the script. A storyboard is similar to a comic strip: each scene is drawn shot by shot, showing the camera angles and framings to use. Remember to consider things like the rule of thirds, composition, axis of action, film structure, and so on.

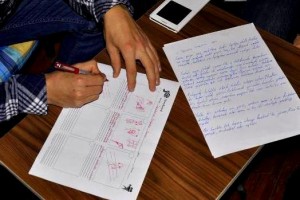
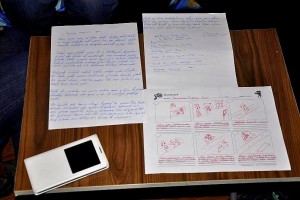
Developing a storyboard based on script
Any movement – of the actors or the camera – can be shown with arrows. Under each shot you can describe the action or dialogue that takes place, the lighting to use, and give any pointers to the camera operator, for example if they should use racking focus. Mention any titles or information that could be relevant at the editing stage.
Give as much detail as possible on each shot to make sure you get the exact result you want.
You can download a storyboard template at the end of this chapter.
How long each shot lasts and how often you changing the framing will depend on many things: your vision of the films aesthetics, the time available for the shoot, and how much time you actually want to spend filming different types of shots. You’ll find that an action film, for example, changes framing at least every five seconds. Pick a film and check how long each shot is by counting the seconds after each cut.
The shooting schedule
A shooting schedule is a chronologic overview of all shooting days and shots based on the script / and or storyboard.
Its main aim is to keep costs and organisational efforts low. So if several scenes in the film take place in the same location, it makes sense to shoot all of them together, on the same day. Documentaries are the exception to this approach as the story can develop in the process of filming.
For each day of the shoot, note down: the exact date and the time to film, the location(s) and exact spot (for example, in front of the house), the individual shots, the crew members and their tasks, and the actors.
You should also make a note of any equipment, wardrobe, props, and safety issues. What will you need to do with electronic devices if it starts to rain? Is there any risk to the actors, for example from a fire in the scene?
Logistics such as transport (how will everybody get there / where can you park) and providing drinks and food will also need to be considered on a daily basis.
Example of a shooting schedule:
| Date | Shot No. | Location(s) and spots | Film team and tasks | Actors | Equipment | Wardrobe and props | Safety issues | Transport | Catering |
| 24/04/2015 | 1 2 6 9 11 13 |
Peter’s house: attic attic living room living room bathroom in front of the house |
John (director) Susan (camera 1) Bob (camera 2) Patricia (audio and lighting) Leon (wardrobe and props) |
Mr Miller and his dog Fluffy | 2 cameras 2 tripods 1 microphone rod … |
blue-checked shirt, black trousers | in case of rain no shooting outside | everybody travelling by car, on-street parking | Mrs Miller (also think about walking the dog) |
| 25/04/2015 | … | … | … | … | … | … | … | … | … |
| … |
Common mistakes
- Lack of knowledge about building a dramatic narrative, the story is not told in an interesting way, or it’s not presented in enough detail, and so the audience can’t follow what’s happening.
- Breaking the rules on combining shots (see Film structure): for example, filming over the axis of action, no continuity of props or clothes, actors have a different haircut / facial hair in a scene shot over several days
- Lack of motivation because teacher and/or students are aiming too high.
Exercises
It can take time to come up with a good idea for a story, but there are things you can do to help you get the inspiration you need.
- Good stories often come from events and interactions that are happening right in front of us. Keep your eyes open and observe what people around you are doing day to day.
- Even something as small as a photo can act as inspiration. Look around you and see if there are any everyday/interesting objects that tell a story, and try to develop it further.
- Creative writing exercises can also help you generate ideas for a film. You will find plenty of those online and in specialist books.
- When you have an idea, write it down as soon as possible – even if it’s in the middle of the night! Carry a notebook, use your phone, or do it any other way you want. Just make sure you hold on to your idea!
Related topics and links to external resources
Chapters: Camera basics / Composition and colour / Basics of lighting / Film structure / Plot and character analysis
Template for writing a storyboard / Celtx is a software for writing and viewing a script and a filming plan on different devices (for example computer, tablet, smartphone) and for collaborative working on a single script via the internet. The basic version is free. See: https://www.celtx.com/index.html
Methodology
Including too much detail in a script or storyboard can kill the motivation of the young people you’re working with. If the story is not too complex, you could go straight to the storyboard and avoid writing a script.
Either way, it’s important to find a good balance between giving enough detail in the script and / or storyboard and leaving room to improvise during the shoot. Filming should be a fun activity, so if you can, try to avoid filming the same shot over and over again for the sake of achieving exactly what your storyboard says. This could get very boring very quickly.
Keep things simple, and don’t plan to change camera angles and framing too often.
Use amateur videos by young people rather than professional production to give your group an example of a particular type of film. This will help your group get a realistic idea of what they could achieve, and won’t put unnecessary pressure on them regarding production quality.
You should be clear about the educational outcomes you’re trying to achieve. Are you more interested in developing your students’ ability to learn, the social interaction between them, and helping them improve their filming and interpersonal skills? Or is the quality of the film more important?
It’s of course possible to take both into account, depending on the scope of your project. But given that the target group is young people, their knowledge, skills and potential will always need to be factored into your planning.
Try to find out how the students themselves feel about the quality of the film or video they will be working on. Some might have high but unrealistic expectations, perhaps in part because they know their work will be shared online and they want it to be really good. Manage these expectations and explain that it’s okay if the film doesn’t look professional.
Last but not least, remember to take a step back. This should be the young people’s film. Don’t steer their thinking or the production process too much by imposing your own ideas. If you do, the students will enjoy the project less, feel unchallenged, and their intrinsic motivation will decrease as a result.
Your main task is to create a learning environment that fosters a great learning experience and improves the young people’s skills. It doesn’t matter if the quality of the film isn’t very high. The real measure of a successful education project is the quality of the learning, and that’s what you should work towards in the long term.
Terminology
synopsis, script, storyboard, scene, axis of action