Camera advanced
Introduction
This chapter is all about the manual settings of your camera. We’ll help you learn how to use them so you can get the result you want and explore your creativity.
| |
Vision in action |
|
|
||
Equipment and tools
The basic equipment you need to do the exercises in this chapter is a camera with manual settings, and a tripod.
Main section
White balance
The white balance (WB) is one of the functions that need to be adjusted when you’re using your camera’s manual settings.
On a filming location you can sometimes see a person standing in front of a camera with a white piece of paper. They are most probably helping the camera operator adjust the white balance. But what exactly is white balance?
Different light sources make the colour white appear differently. It all depends on the colour temperature of the light source. The light outside on a bright sunny day is blueish, or cool (light temperature 5200 K), while the light from a tungsten bulb is yellowish, or warm (light temperature 3200 K).
Because of the way our brains work, our eyes tend to see white surfaces in the same uniform white, even if they are lit by different light sources. Cameras, on the other hand, detect the colour temperature of the light source [and are able to adjust the picture to the colour temperature.] This gives the picture a slight tint, ranging from yellow to blue. The white balance must be adjusted manually so that the white in the picture is the same or similar to the white we see with our eyes.
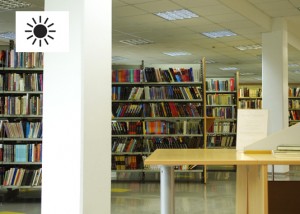
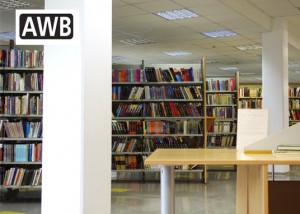
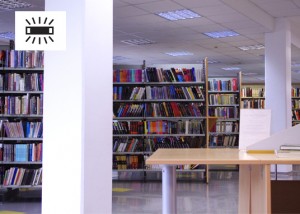

Use of different WB settings
When should you adjust WB manually?
- When the colour of the picture seems unnatural.
- [When you’re filming with two or more cameras of the same or different type. Then we should adjust the WB for each camera by setting it manually from its respective position on the set directing to the area, that it will be filming.]
- When you want to get a special effect (very cool or very warm colour tones).
How can you adjust WB manually?
Find the WB button on the camera or in the menu, and try out the different options you’ll find in the presets. Most cameras have presets for daylight, tungsten and fluorescent / neon light.
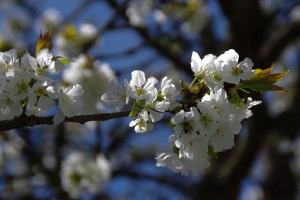
You can also use your camera’s ‘one-push’ mode button to set a custom WB. The camera has to be directed at a white surface – like a white piece of paper or a white wall – that covers at least 70% of the picture.
Video: Setting WB manually
Focus
Setting the focus of your camera is one of the most important things you should learn to do manually. The main subject in the picture must always be in focus, or sharp, unless you want it blurry on purpose.
In case of a more simple camera you might find the manual focus option in the menu. In better-quality cameras you’ll find the button or focus ring near the lens. Good video cameras will also usually have a so-called ‘focus peaking’ option. Depending on the camera, you can activate focus peaking via the menu, a dedicated button, or freely definable buttons. Once it’s activated, the areas in focus will be highlighted by a halo of white pixels on the display screen (you may be able to change the highlighting colour in the menu as well).
Many cameras also have touch-screen focus or a focus-tracking option.
When should you adjust the focus manually?
- Whenever possible. It might be difficult if the main subject is moving or you don’t have much time, but try to use manual focus in most cases.
- In poor light conditions or when the light changes frequently, for example during a light show.
- To visibly change focus (refocus) from one object / person to another in the same shot – the so-called racking focus. The objects or people must be at different distances relative to the camera.
- To keep the focus on the main subject while another suddenly enters the shot, for example in an interview situation. In automatic mode the camera would try to refocus on the new object or person, and the subject you are filming may become blurred.
- When you’re unable to focus on your main subject using automatic focus. This is common when the subject is not the brightest thing in the picture. For example, when the main subject is in front of a white / bright surface, the camera will automatically focus on the white surface behind. Or if the main subject is behind another bright object, such as a microphone stand or reflector light, the camera will automatically focus on the bright object. This sort of error is not usually visible on a small screen, but it’s much more noticeable when the film is projected onto a big screen.
When should you leave the focus on automatic?
When you’re filming a documentary video or a TV news item, and you don’t have another opportunity to repeat the shot. Automatic focus also helps when the action in the shot is happening very quickly.
How to focus
Point the camera at the main subject, zoom in completely and focus, then zoom out to the framing you want. If your main subject is a person, focus on the eyes.
You can use the auto-focus option to set the focus while you’re zoomed in, but remember to set the camera back to manual focus before zooming out!
Video: focusing manually
Better-quality cameras usually have a ‘push-auto’ button, which can only be used in manual-focus mode. This allows you to film a single shot using auto focus before reverting back to manual-focus mode automatically. 2
The push-auto button can also be used to get a continuous racking focus. Set the focus on an object manually, then press the push-auto button so that the camera automatically focuses on another object at a different distance from the camera. 3
Exposure
Most cameras will let you control the exposure of your shots – the amount of light that enters the lens – using the aperture (or iris) function. Good video and photo cameras also allow you to manipulate the amount of light by setting the shutter speed manually.
Automatic aperture settings choose an average value for the given light conditions. Sometimes you have to adjust the aperture manually so that the main subject is properly lit. You can do this by narrowing or widening the iris to the appropriate aperture value. You’ll need to make sure the rest of the picture doesn’t become too bright or too dark.
From dark to bright – five aperture values, with the automatic setting in the middle
By setting the shutter speed manually, you can control the length of time that the shutter stays open, and thus the amount of light that enters the lens. Most video cameras have their shutter speed preset at 1 / 50s. A slower shutter speed would make any moving objects or people in the picture appear blurry. 5
It takes a lot of practise to adjust the shutter speed manually, so in most cases you will only be adjusting the iris.
When to adjust the amount of light manually
- When your main subject isn’t properly lit or even visible. This can happen when there is a big difference in the brightness of the subject and that of its surroundings – for example when someone stands in the shadow and area around them is bright, or when someone is standing in the spotlight, surrounded by darkness.
- If the amount of light is changing very frequently. This can be during a light show, a concert, a film screening, or when clouds pass in front of the sun, obscuring and exposing it in quick succession. The camera’s automatic settings can get easily confused and aren’t able to adjust to changing light conditions quickly enough.
Many cameras have really useful automatic features, but these can never accurately predict what you’re trying to film at a specific moment. This is where the camera operator comes in!
You could attach a special viewfinder and/or a sunshade over your display screen to help you see the light and colour of the picture better. You could even build one yourself, with a bit of imagination and some basic technical skills.
ISO – Sensitivity of camera sensors
ISO values tell us how light-sensitive a camera’s image sensor is at any given moment. On most consumer cameras, or when you’re using the camera in automatic mode, the ISO adjusts automatically with changes in the light conditions.
You can manually adjust the ISO on good video and photo cameras. Increasing the ISO value in poor light conditions will help you get a brighter shot, but it can also make the image appear grainy.
The graininess at higher ISO levels depends a lot on the age and the price of the camera. The newer and the more expensive the camera, the less grainy the picture is likely to be when you increase the ISO level. Either way, you will always need to compromise between brightness and graininess when there isn’t enough light.
You can learn more about ISO from photography tutorials.
Zebra and histogram
These are two other features that give you better control over the picture quality. Check your camera menu and additional buttons to find these, or read your camera’s manual.
Zebra
You’ll find this feature on most good-quality cameras. When it’s switched on, you can see a zebra pattern on your display screen (but not on recorded material). It covers those parts of the picture that are overexposed – that is, areas that are extremely white and have lost most or all of their detail.
You can set the function so that the zebra pattern appears at different exposure levels, or thresholds. A threshold of 100 would show you extremely white, overexposed areas, for example a very bright sky or sheets hanging out to dry. Decrease the threshold to 90, 80 or 70, and the zebra function will tell you if other, less bright surfaces, are becoming overexposed.
You should generally try to avoid zebra patterns in your picture. Depending on what you are shooting, a small amount is ok – for example on white objects, clothing, houses, clouds. For white facial skin, set the threshold to 80 and make sure there are no zebra patters on the face you’re filming.
Narrowing the aperture on your camera reduces the amount of light entering the lens as well as the extent of the zebra pattern you see on the display screen.

The zebra function marks the brightest spots in the picture
Histogram
This feature displays the distribution of tones in the picture and helps you prevent both over- and underexposure. The area on the left (see below) shows dark tones, the area in the middle shows middle tones, and the area on the right shows bright tones.
Reading a histogram correctly takes practice. For general shots the values should be balanced in the middle section with no extreme left or right values. But the histogram display also depends on the ratio of light and shadow in the picture, or the picture’s light key (see Composition and colour). A very bright picture (high key) will have most of its values displayed on the right side of the histogram, while a picture with a lot of shadow (low key) will have them displayed on the left.
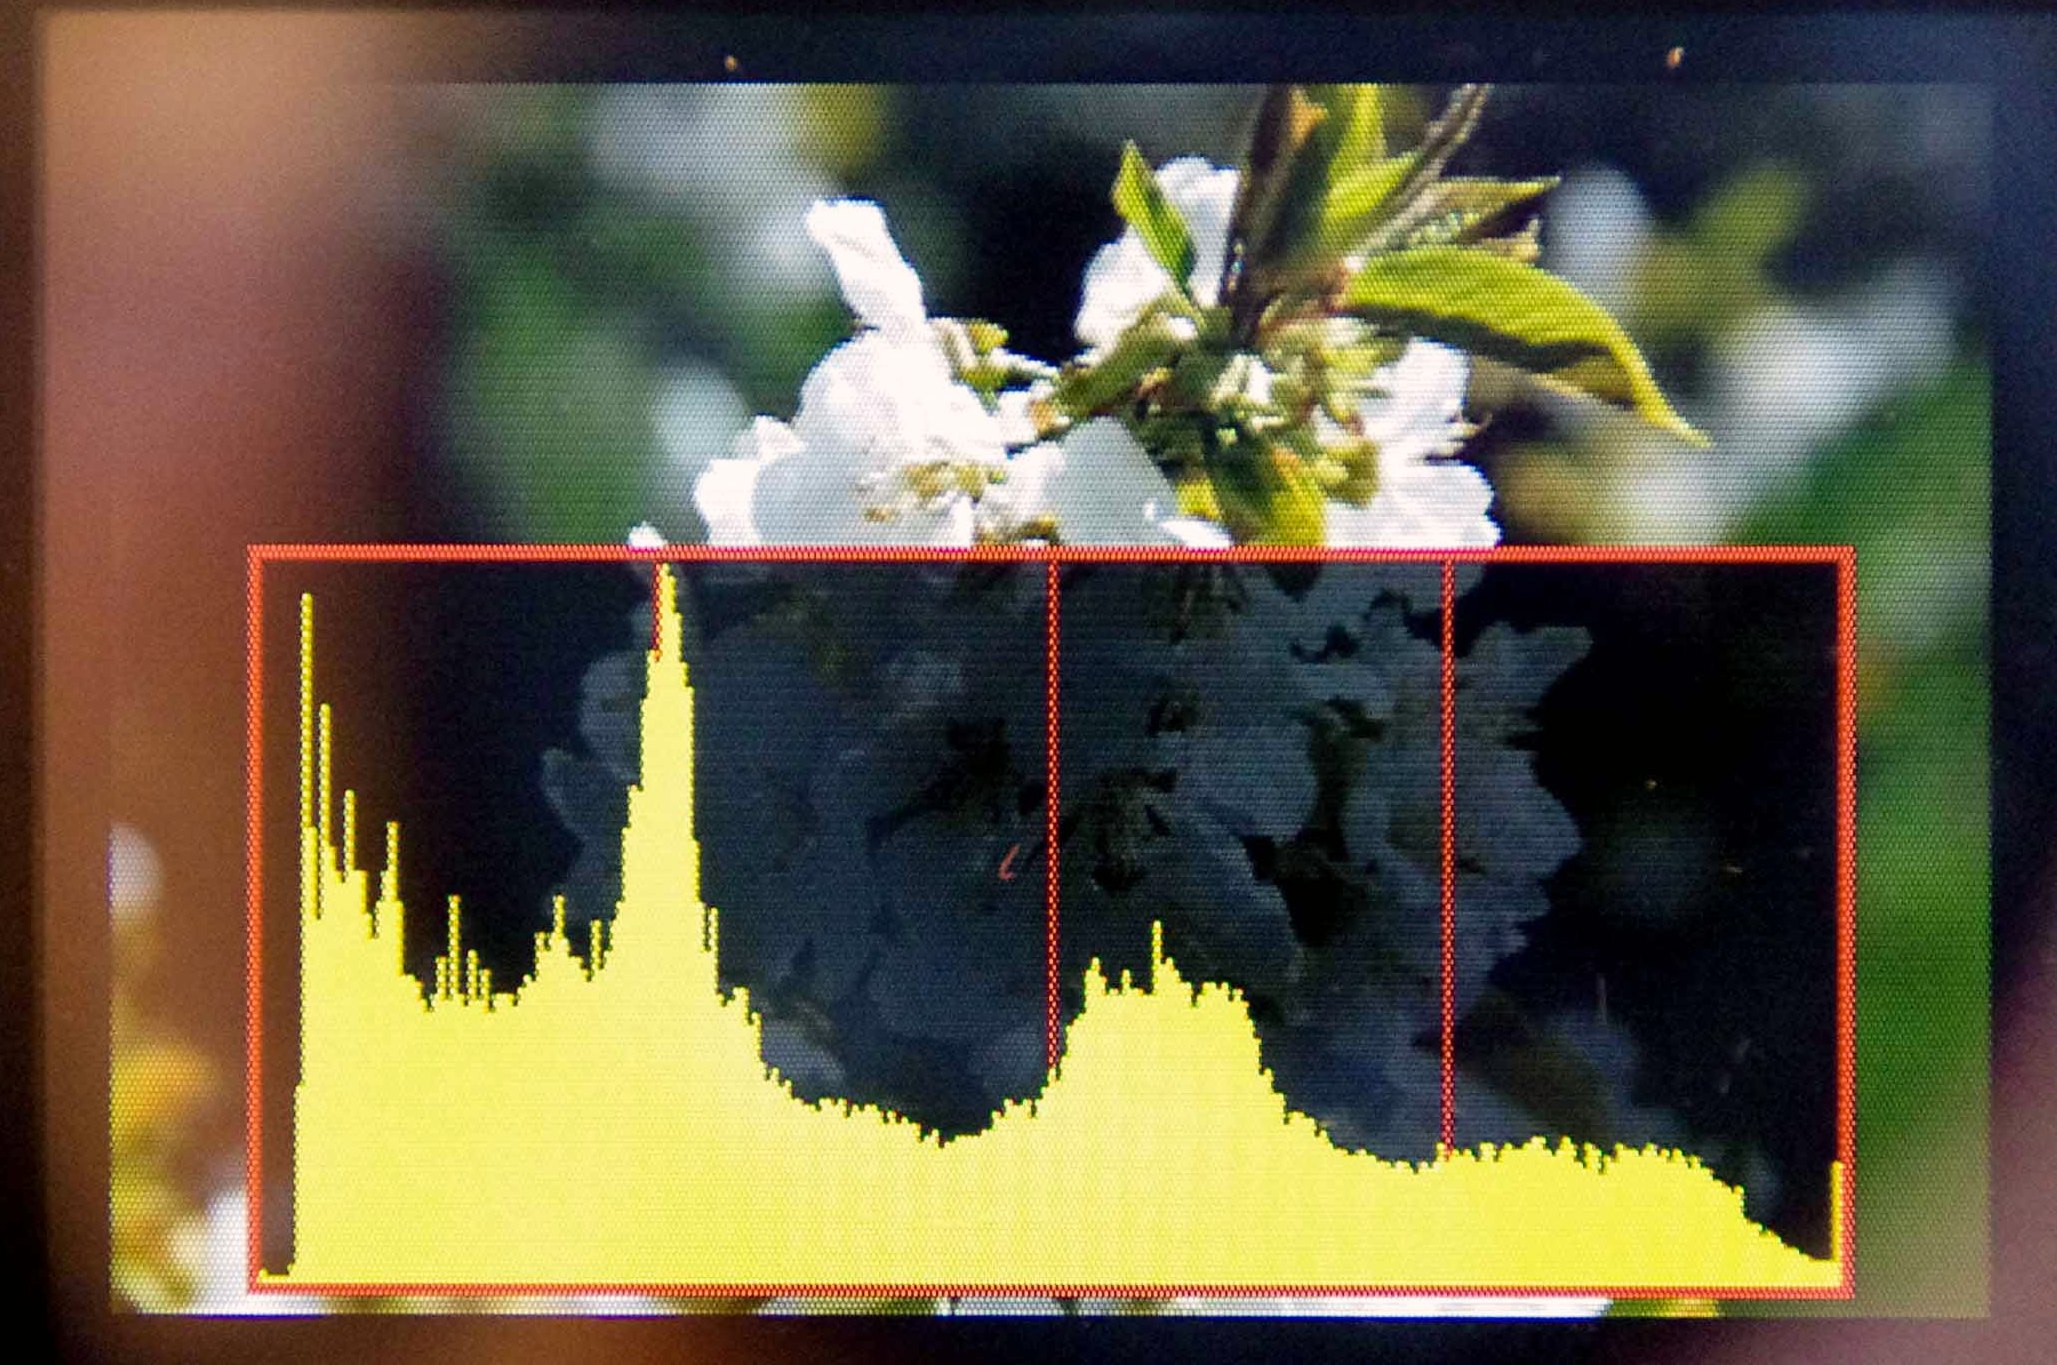
Histogram
To find out more, experiment with the zebra and histogram functions, and research them in more detail.
Lenses
Better-quality video and photo cameras allow you to change lenses so that you can shoot with wider or narrower framing and apply special effects like fisheye. Most consumer cameras have a zoom function you can use, though this doesn’t usually stretch to extremely wide shots or extreme close-ups.
By zooming or using different lenses you can also change other components of the picture like depth of focus.
| Type of lens | Characteristics of picture |
| extreme wide-angle lens, or fisheye lens | very wide angle of filming; outer lines appear very curved; mostly used as a special effect |
| wide-angle lens (or zoom-out on consumer camera) | wide angle of filming; outer lines appear slightly curved; big depth of focus, most of the objects in the picture are very sharp; creates an open atmosphere |
| neutral lens | covers an angle similar to that of our eyes; neutral picture; mostly used in TV productions, documentaries and interviews to provide objective, neutral shots |
| narrow lens (zoom-in on consumer camera) | narrower angle of filming; background appears closer to the main subject; smaller depth of focus, only the area around the main subject is sharp; creates a claustrophobic atmosphere |
| extreme narrow lens, or telephoto lens | very narrow angle of filming; usually only the main subject (or a part of it) is in focus, everything else is blurry; usually used to draw attention to a single detail |


a photo taken with a 18mm lens (zoom-out) and another with the same framing but from a distance and with a 200mm lens (zoom-in). Through the higher focal-length the background appears to be blurry.
Common mistakes
- Not choosing the best settings for the given conditions. If you’re not sure how to use the manual settings, leave the camera on automatic, or check which settings the automatic function would choose and practise applying them manually.
- Shooting with two or more cameras that have different WB and iris settings. This means additional work in post-production to correct colour and brightness. You might even end up with incompatible shots.
Exercises
White balance
- Shoot three different scenes – one outdoors in daylight, one indoors with tungsten light, and one indoors with neon light. Film each scene four times, using three different WB presets and finally setting the WB manually yourself. Remember to take a white piece of paper with you.
- Using several different colour surfaces, try to set WB with the one-push button. See what effect this creates.
- Try to find examples of films that use extreme WB. Is the colour of the film warmer (yellowish) or cooler (bluish)? In your opinion, what kinds of WB are suitable for what kinds of film?
- Think of a subject that would allow you to use extreme WB. Make a short video about it using very cool and / or very warm light.
Focus
- Find the manual focus option on your camera and focus on something, for example a person giving an interview.
- Set up the following shot: a person stands in the near distance, and another passes in front of the camera. Film the shot twice, then compare the picture:
- first using automatic focus
- then manually focusing on the person at the back
- Manually refocus from an object / person in the foreground to an object / person in the background. Don’t zoom or move the camera.
Exposure
- Find the manual iris / aperture option on your camera. Pick an object and set the light manually, gradually going from very dark to very bright.
- Try to find the best manual iris / aperture settings for the below shots. Feel free to experiment with any other examples you can think of too:
- a person in front of a black background
- a person outdoors, standing in shadow, but surrounded by bright light
- a person indoors, standing in front of a window
Related topics and links to external resources
Chapter: Camera basics / Composition and colour
Very descriptive interactive bokeh (blurred backgroud) simulator & depth of field calculator
Single picture that explains how aperture, shutter speed and ISO work in photography
100 Helpful Photography Tutorials for Beginners and Professionals
Camera technology is based on photography. Studying photographic theory and technology would give you an even better overview of manual functions and their capabilities.
Methodology
After you finish your storyboard but before you start shooting, go through your filming plan and think about how you could improve your shots using your camera’s manual functions.
Terminology
racking focus, white balance, depth of focus, aperture / iris, shutter, ISO, wide angle lens, telephoto lens