
Introduction
If you are following our handbook systematically then you already have a list of characters, objects and backgrounds with all sizes that you will need to create in order to be able to film your story. If not please read the previous chapters in the Animavision part of this handbook first and follow the necessary steps that we recommend to make a stop motion animation film.
In this chapter we will explain more about the creation of all the necessary elements for 3D stop motion techniques with a focus on plasticine as the main materials.
| |
AnimaVision in action |
|
|
||
Material, equipment and tools
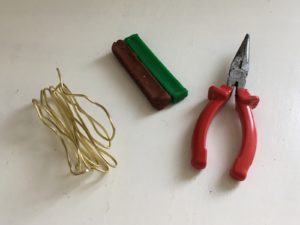
In order to successfully create the characters, objects and backgrounds for the plasticine stop motion film you will mostly need plasticine, cardboard, sometimes wire and some tools like pliers. If you make the plasticine yourself you will also need basic ingredients (see the recipe listed below), a pot and a cooker.
A a ruler can be useful to measure the sizes of the elements that you will be creating and a scale to weigh the ingredients or plasticine when needed. You can successfully combine plasticine with other materials like rope, textile, wood …
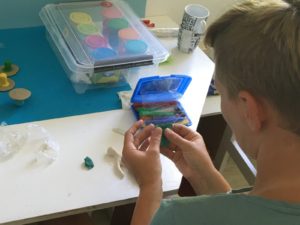
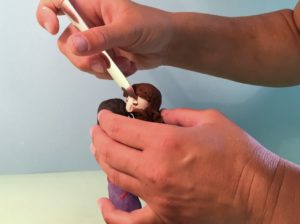
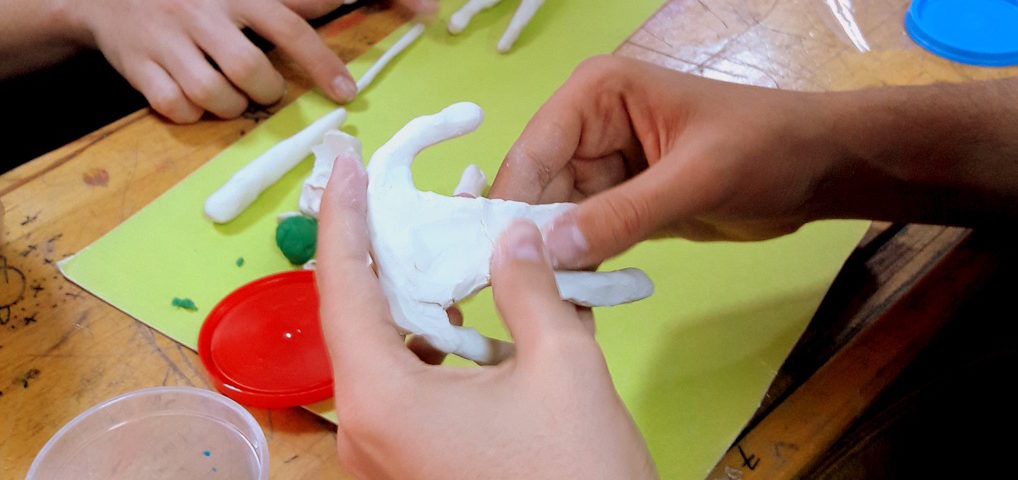
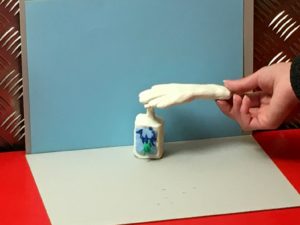
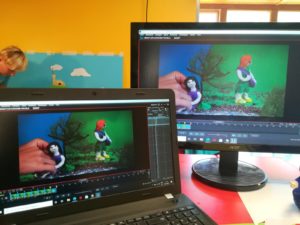
Plasticine is a great material for creating stop motion animations. On the third picture you can see that for the objects and background – beside plasticine – small pieces of wood, plastic foil and paper were used and on the fourth picture some tools were used to help shape the figures.
Main part
Most of the preparatory work you need to do to create characters, objects and backgrounds for your stop-motion film is similar up to this point for 2D and 3D techniques. But from the moment you create the actual animation, the use of different techniques results in a difference in several aspects. Besides the different camera set-up, the use of the material gives you different options.
We recommend that you simulate the animation setup or test the animation setup including the camera you want to use for your film before you start the actual creation of the animation film. Please refer to the instructions in the chapters about the camera. This will help you to create all the necessary elements even more precisely according to the technical requirements.
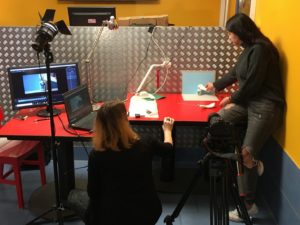
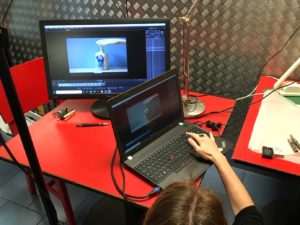
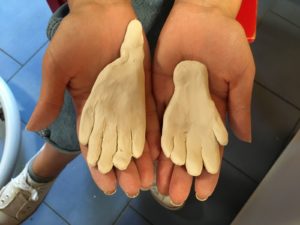
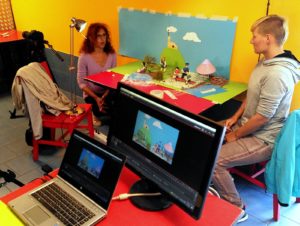
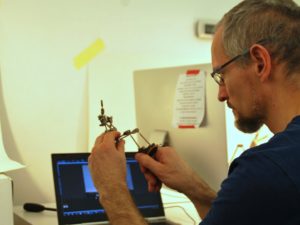
The sizes of the characters, objects and backgrounds also depend on the quality of your camera (for example how big the camera zoom is) and amount of material that you have. In the pictures above you can see a setup and objects (hands) for a narow shot that was used in the film.
Some facts about plasticine
Plasticine is a mouldable material that is very suitable for creating stop-motion figures and objects. It was developed more than a hundred years ago and is a very popular material for recreational activities for different age groups. In the past and even today, many children play outside with clay and mud, and in many cultures today, play-doh is given to young children to stimulate their motor development and creativity. Various researches also show that creative activity with clay causes the formation of brain cells and synapses in the brain that are not formed by everyday activities. When working with modelling clay, one performs various hand movements that are not found in any other activity.
Working with plasticine is fun not only for children but also for grown ups.
‘’Plasticine is also used in many professional stop motion animation film productions and there exists a special name for it – claymation.’
What differentiates plasticine from clay is the capacity to stay moldable when exposed to air for a longer time. So to create a stop motion, especially if it takes several days or even weeks, it is important to use plasticine that does not dry up (it contains oils) and doesn’t get hard when exposed to air and light.
If you want to use professional plasticine, please research online which plasticine is used in professional productions. But for the beginning you can try to use the local store plasticine or even make plasticine yourselves.
Although plasticine is a great materal, it requires some percaution when using it. Plasticine can be very messy especially when creating and animating characters and objects. This doesn’t seem like a big issue for the background since you don’t touch or move it every second frame. There are several ways to keep your working surface, hands and plasticine clean. It is good to always have some baby wipes containing oil nearby so that you can always keep surface on which you animate (which should be smooth and easy to wipe) and your hands clean as well. You should also always cover your figures and objects with plastic wrap after use so that they don’t get dusty until the next time you use them.
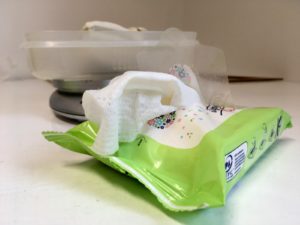
Use whipes that contain oil to keep your hands and surface clean and cover the figures with foil when not using them.
Homemade plasticine
The good thing about homemade modelling clay is that it is easy to make, very inexpensive and suitable for people who are sensitive to toxic ingredients. The downside is that it is a bit softer and therefore harder to use for upright figures and that at the same time changes in the consistency when exposed to air or light or difference in temperature for a longer time. However it is worth trying it and exploring what are the possibilities that it offers to you.
The basic plasticine recipe:
125 g flour
240 ml water
4 tablespoons salt
1 tablespoon baking powder
1 tablespoon oil
Edible food colourings
Mix all together in a pot, cook it till you get a ball, cool it on baking paper then knead it. Let it cool off completely and your plasticine is ready. Before or after you can add different colors. If you or the participants are sensitive to artificial colourings, it is recommended that the colourings are edible.
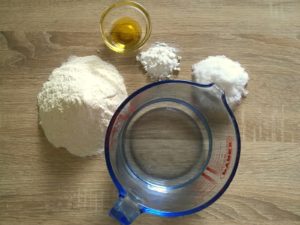
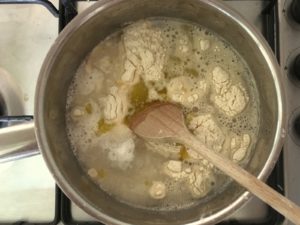
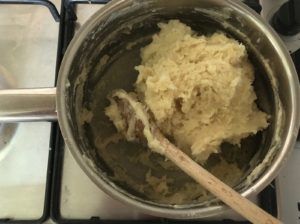

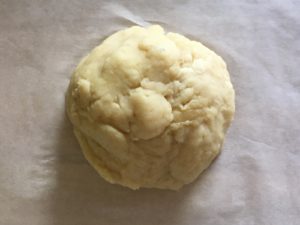
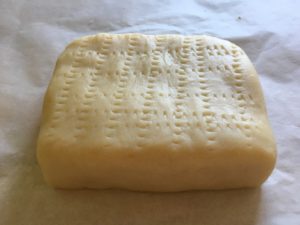
On the pictures above you can visually follow the process of making homemade plasticine.
You can easily change shapes with plasticine. The stop-motion magic that we keep mentioning comes mainly from unnatural happenings. One of them is certainly the change or transformation of a shape. And plasticine is a great material to play with changes.
In the video above you can see an example of changing forms with plasticine.
Plasticine characters
Creating characters and objects is one of the key steps in making your stop motion animation. Already when building a story, character profiles and overall style of the film, you should put a lot of thought into how your main character or characters should look like. You should define their physical appearance (body type, the color of their skin, eyes, clothes that their are wearing…) as well as their personality traits and mood that reflects in their physical appearance. Now when you came to the part of making them – and on the basis of the technique that you are using – you have to think even more in detail.
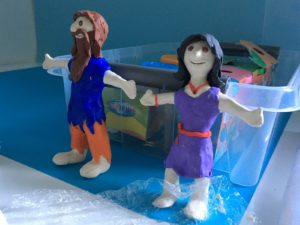
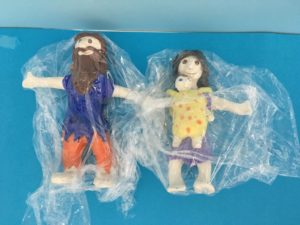
With plasticine you can make a humanoid as well as some other types of characters. Your characters canhave a simple form with added eyes and/or lips that make them alive, you can create simple little monsters or simple animals, and animals, humans or other creatures with more detailed features similar to humans.
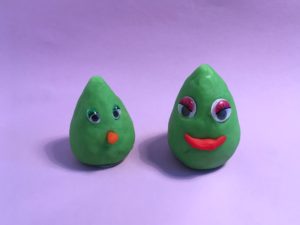
In the pictures above you can see examples of imaginative and humanoid figures made from plasticine.
Making a humanoid character from one piece
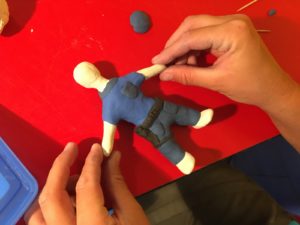
When creating characters from plasticine it is recommended to create them mostly from one piece (not separate pieces that you attach later together) in order to make it more stable. Especially when the character has legs, and has to stand or walk around, It is important that you focus on their stability. That means that you put a special emphasis and weight on their lower body parts.
If you are making longer animation films and the main character gets worn out due to extensive use, you can create more of the same characters. A good way to make copies that are as similar as possible is to make a prototype and weigh out the amount of modelling clay you use for the body.
In the video above you can follow the process of creating a plasticine character for a stop motion film in one of the Animavision workshops.
Use of support constructions to stabilise your figures
Your figure will be more sturdy if you support the body with some kind of base. You can make the support yourself from wire (see the process of making simple constructions below) or you can buy it. Purchased constructions already have a very complex structure, have many movable joints and can be shaped into different forms using screws. They are particularly practical for human figures or animals with complex movements that require precision. These constructions can be wrapped with plasticine (or even a sponge and fabric) and figures can be created in this way.
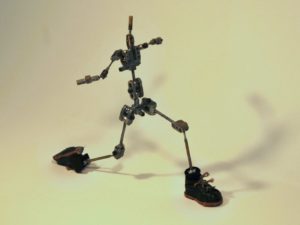
Professional character base with movable joints can be a good basis for creating characters with good movable features.
Making objects from plasticine
Since plasticine is not always affordable when you need it in bigger amounts, like for creating bigger or massive objects, you can simplify the process with using some other material as the basis, for example cardboard or wood. In this case make a basic shape from more affordable material and just cover it with a thin layer of plasticine.
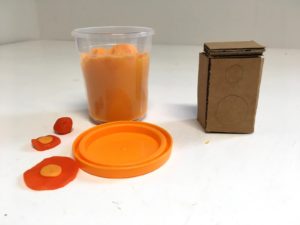
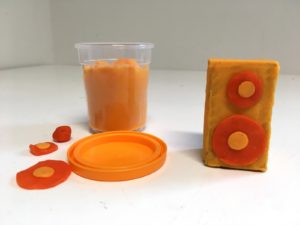
The speaker in the picture above was first made from cardboard and covered with a thin layer of plasticine
Using self made constructions to make objects sturdier
A base give your objects and characters a good stability. They can be self made or bought. You can make a this construction yourself from wire, aluminium or something similar. You should usually do it when you want to create a stable stand that you can then coat with plasticine or some other material.
Self made armatures can be especially handy for supporting different standing or hard objects like trees, buildings, sticks …,
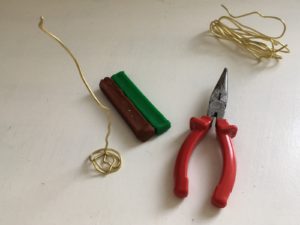

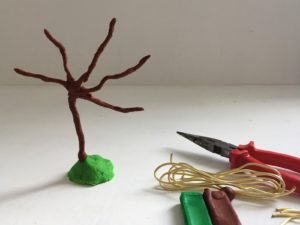
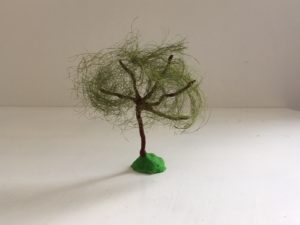
In the pictures above you can follow the process of building a selfmade base for a tree. You should put a special emphasis on the stand in order to make your objects stable.
Backgrounds in 3D animation
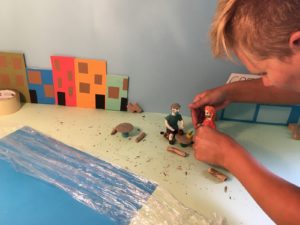
When creating 3D animation with plasticine, puppets or blocks, it is often required to have a background that is surrounding the scene from the bottom, the sides and sometimes also from the top in order for you to be able to get versatile camera positions. This also depends on your storyboard and the camera angles that you plan for different shots.
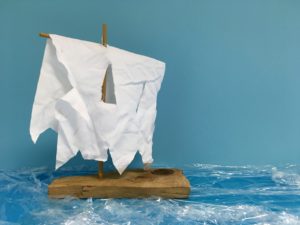
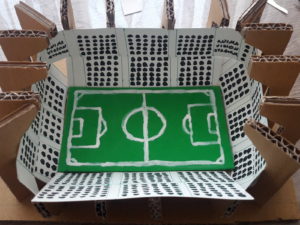
In the pictures above you can see two types of background. In the picture one the background is just flat since the shot is taken only from the front position. In the picture two you can see an example of a background that is surrounding the scene from all sides except the top what offered more shooting positions.
Backgrounds can be made from plasticine only, or combined with other materials like cardboard, wood… They can also be made from completely different materials like paper, cardboard, wood, plastic, etc.
One good combination of the background is a cardboard covered with plasticine that you can also texturise and add details to. The process of making it is same to the one explained above in the part about making objects.
Plasticine is usually used for a 3D stop motion animation with the camera shooting from the front, but it can also be used for making 2D stop motion animation with the camera filming from above.
Final remarks
In this chapter we mostly discussed plasticine as a material for creating 3D animations. There are more other options that you can explore.
Puppet stop motion animation is another form of 3D animation. For using puppets you have different options. You can use puppets that you get in local stores, create puppets yourselves or order professional custom made puppets.
For some simple animations, puppets made for children to play with can be used, but for more professional functions, movements and therefore more professional animations, this will not be enough.
Since creating puppets is a big territory that would require a handbook on its own, we focused mostly on plasticine.
Video (On the street – DE): For a simple puppet stop motion you can use the puppets that you have at home, your school or youth center. With some sound added you can get a nice short impression.
The menthors also put their creativity to good use. In one of the trainings for youthworkers we made a film with plasticine.
Film Back to normal – DE, SI, TR was made during one of the trainings.
Different types of blocks can also be used for creating stop motion animation films.
Common mistakes
- One of the common mistakes when preparing your characters, objects and backgrounds is the use of inappropriate material. For example, some types of moldable material that you can buy on the market look like plasticine but dry out and crack or change color when exposed to air. Test your material first.
- The second common mistake when using plasticine is not attaching different parts of characters or objects properly together so they fall off. This can be especially the case when a character or an object does a lot of movement. Try making them out of one piece or use some kind of base.
- If you don’t protect or cover your figures when not using them, it can make them dusty and this will be visible in narrow shots.
- Also not keeping your preparation and animation surface as well as your hands clean can cause a lot of mess when working with materials like plasticine.
Exercises
- Make your own plasticine and explore the possibilities it offers to you. Make different kinds of characters and objects out of it, mix it with colors …
- Look around your home, organisation or local store (or even better and cheaper – in the nature) for different kinds of tools, wires and other materials that you can use when making characters, objects and backgrounds for your film.
- You can play with plasticine (homemade or from the store), transforming it into different shapes. You can capture the whole process and maybe even make a short film out of it.
- Try to do a plasticine stop motion film in 2D with a camera filming from above.
- Develop and film a project involving 3D characters, objects and backgrounds.
Related topics and links to external resources
Chapter: Basics of creating characters, objects and backgrounds
Methodology
When working in a group, divide the tasks based on the character plan, objects and backgrounds that you made in the preparation phase. Dividing the group into smaller groups can be extremely effective and quick if the tasks are divided properly. Some of the participants can create backgrounds, others can create characters and objects and execute more supportive tasks like preparing the materials… In this way, a variety of participants can be included and find their place in a group and in a process.
If the film is more complex, duplicate the characters, objects and backgrounds, if necessary, and shoot various scenes at the same time. Part of the group can work on capturing narrow shots and part of the group can work on capturing wide shots.
Terminology
Plasticine, claymation, base